Fig. 1.1: The mouth-guard
Figs 1.2A and B: View as the endoscope enters the oral cavity. (A, B) Dorsum of the tongue (T) and hard palate (P)
Figs 1.3A and B: Uvula (U) and the base of the tongue (T)
Figs 1.4A and B: Epiglottis (E)
Figs 1.5A to C: The laryngopharynx. Larynx (L) and both pyriform fossae (RPF, LPF). The arrow points to the esophageal inlet
Fig. 1.6: Larynx, right and left pyriform fossae (RPF & LPF respectively) and the esophageal inlet (arrow)
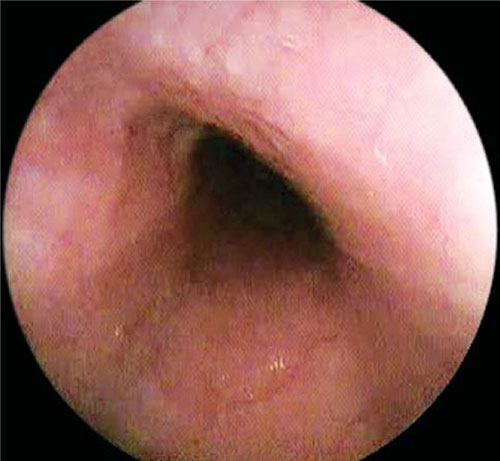
Figs 1.7A and B: (A) Concentric rings of trachea. (B) Tracheal bifurcation
Fig. 1.8: Tracheal impression (arrows) in the proximal esophagus
Figs 1.10A to F: Z line—The squamo-columnar junction
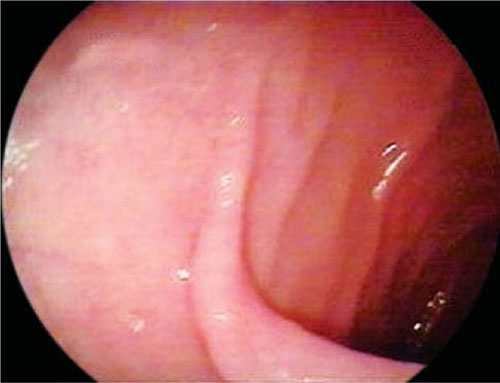
Fig. 1.12: Junction of gastric body and antrum
Figs 1.13A to C: Pylorus. (A) Mucosal folds converging on pylorus. (B) Mucosal folds around pylorus partially flattened out. (C) Antral mucosa completely flattened out revealing the circular pylorus
Fig. 1.14: Transpyloric view of the duodenal bulb (D1). The anterior wall (A), posterior wall (P), superior wall (S) and the inferior wall (I)
Figs 1.15A to C: Duodenal bulb
Figs 1.16A and B: Second part of the duodenum (D2) is marked by the circular mucosal folds
Figs 1.17A to C: Ampulla of Vater (arrow) seen on the medial wall of D2
Fig. 1.18: Junction of D1 and D2
Figs 1.19A to C: (A, B) Antrum and pylorus. (C) Incisura angularis
Figs 1.20A to C: The gastric fundus, as it appears during retroflexion (‘J’ maneuver)
Figs 1.21A and B: The gastric fundus and the GE junction